

Transfer stock between locations
Move stock between stores or warehouses, receive items in POS, and keep transfer history clean.
1. Create a Transfer Between Locations
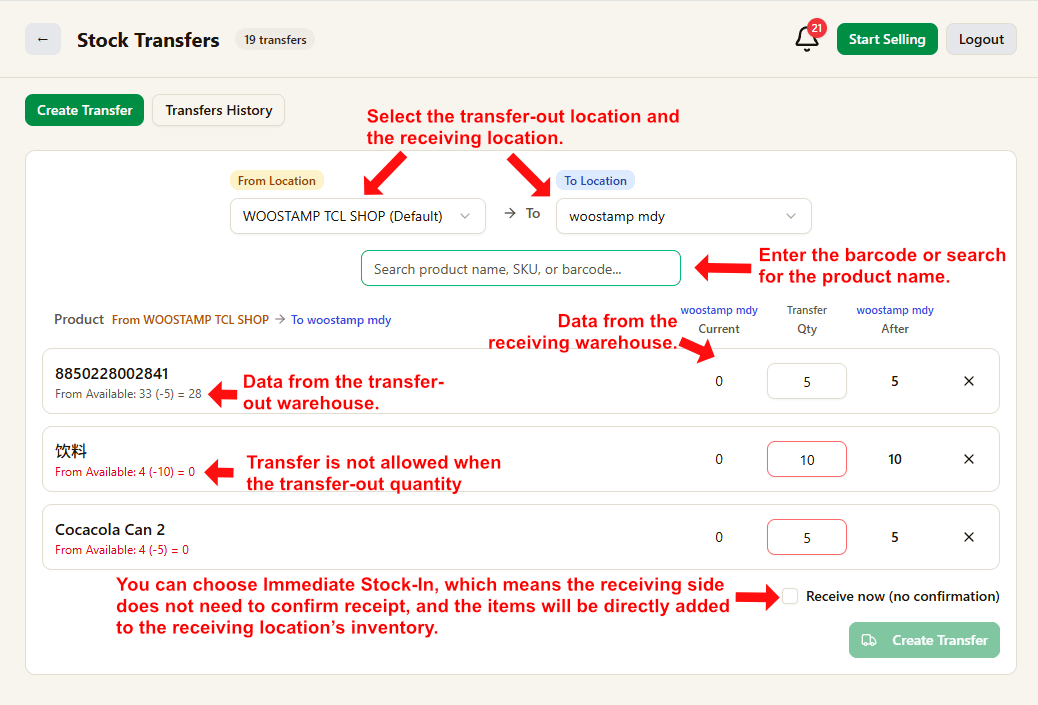
Select From Location and To Location, then search products by name, SKU, or barcode.
The source side shows available stock, and the destination side shows current stock at the receiving location.
Enter transfer quantity for each item. The system blocks quantities above available stock.
If you enable Receive now, the destination location receives stock immediately without a second confirmation step.
2. Check Transfer Status in History
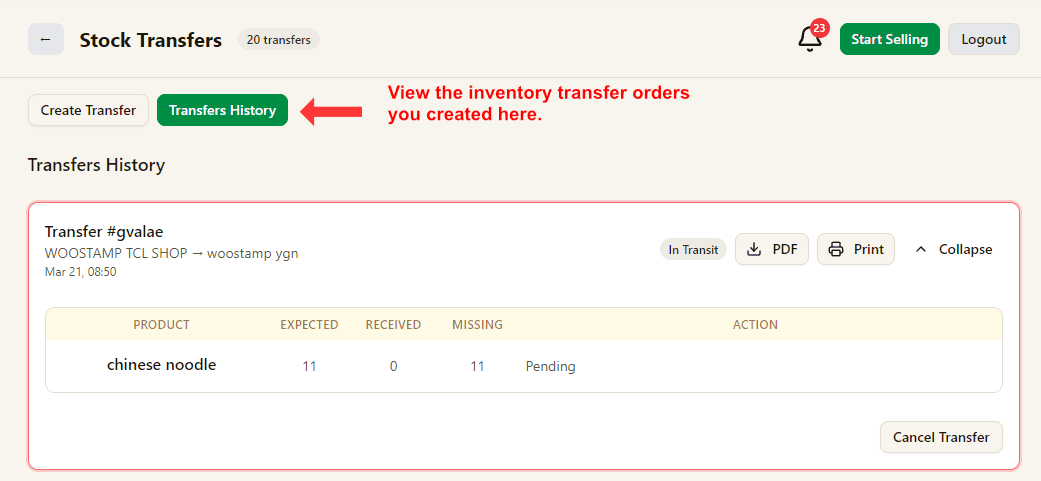
Open Transfers History to review the route, status, expected quantity, received quantity, missing quantity, and print actions.
3. Canceling a Transfer Returns Stock
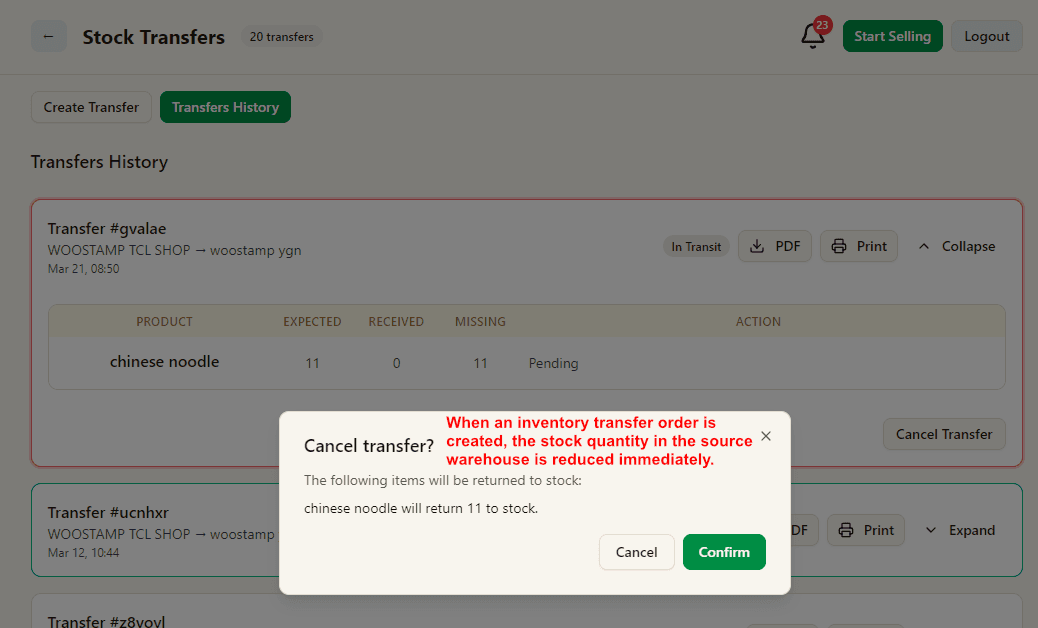
When a transfer is created, stock is deducted from the source location immediately.
If the transfer is canceled later, the system returns the unreceived quantity back to the source location automatically.
4. POS Shows Incoming Transfer Notification
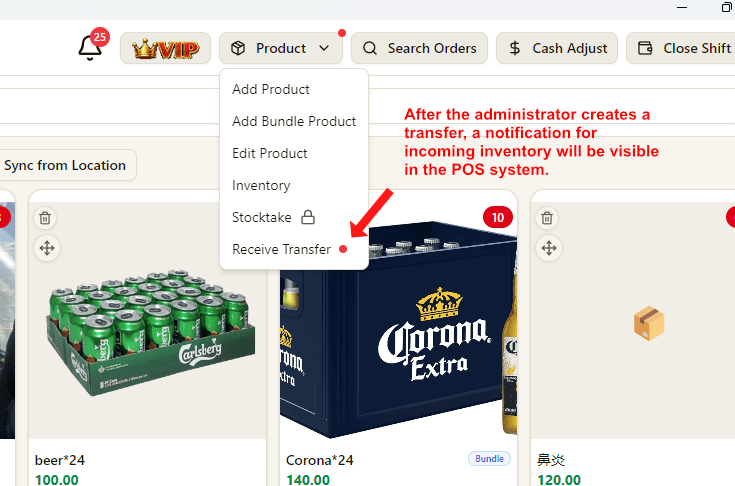
The destination POS sees a red notification under Product to Receive Transfer, so staff know incoming stock is waiting.
5. Receiving Side Confirms Actual Quantity
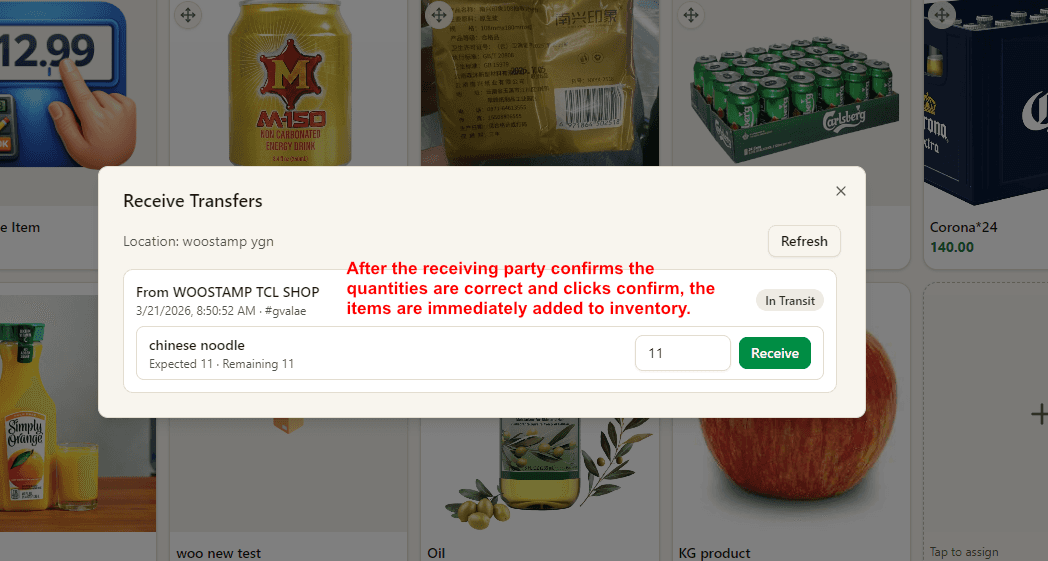
In POS, the receiving side confirms the actual quantity and clicks Receive.
Once confirmed, stock is added to destination inventory immediately.
6. Review Transfer Records in Inventory
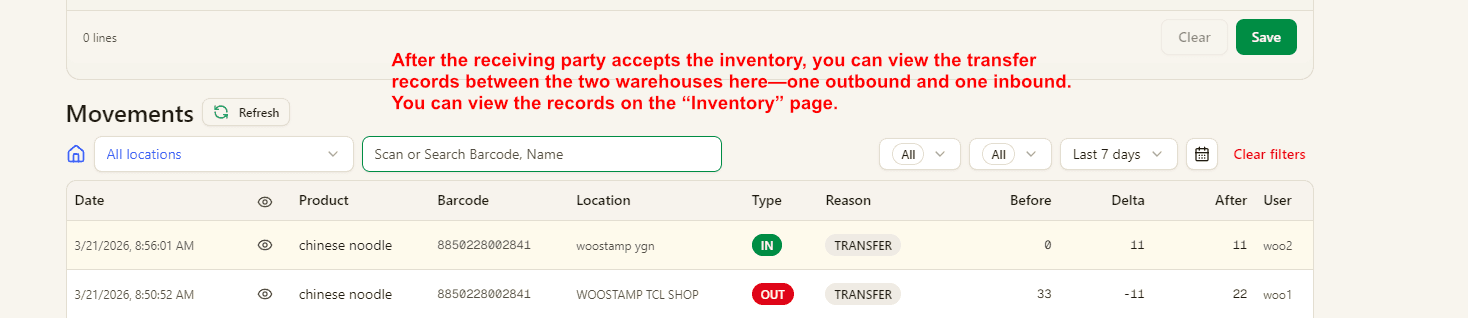
After the transfer is received, you can review both movement records in Inventory.
There will be one OUT record from the source and one IN record for the destination, both marked with reason TRANSFER.