

Stocktake workflow
Count stock, submit variances, and finalize store or chain stocktake tasks with boss approval.
Count stock & perform blind audits
Watch on YouTube1. Create a Stocktake Task
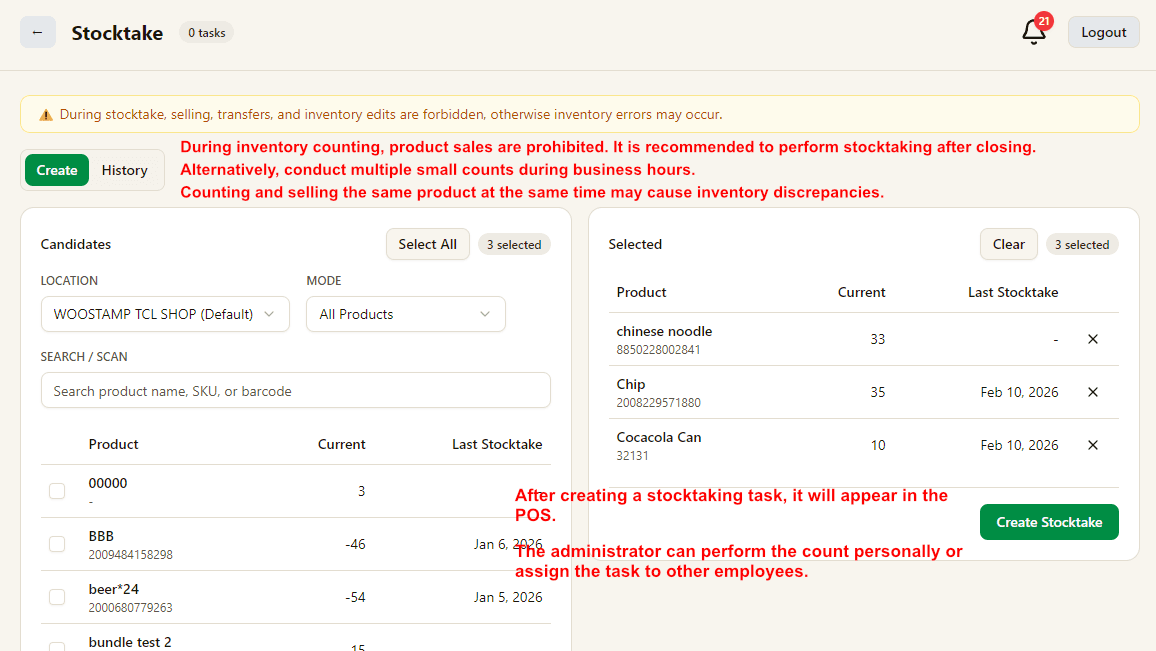
Choose location and mode, search or select products, then click Create Stocktake.
During stocktake, avoid selling, transfers, and inventory edits to prevent stock errors.
2. Confirm Before Start
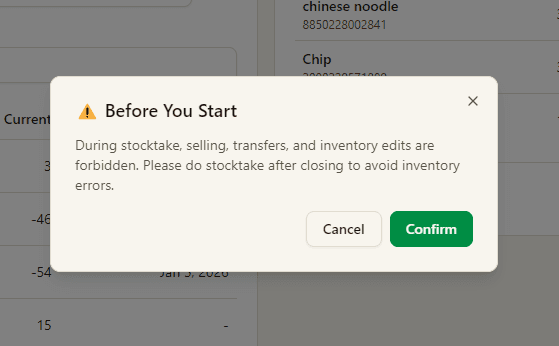
Confirm the warning dialog before starting.
Best practice is to count after closing or split the work into multiple small counts.
3. Track Tasks in History
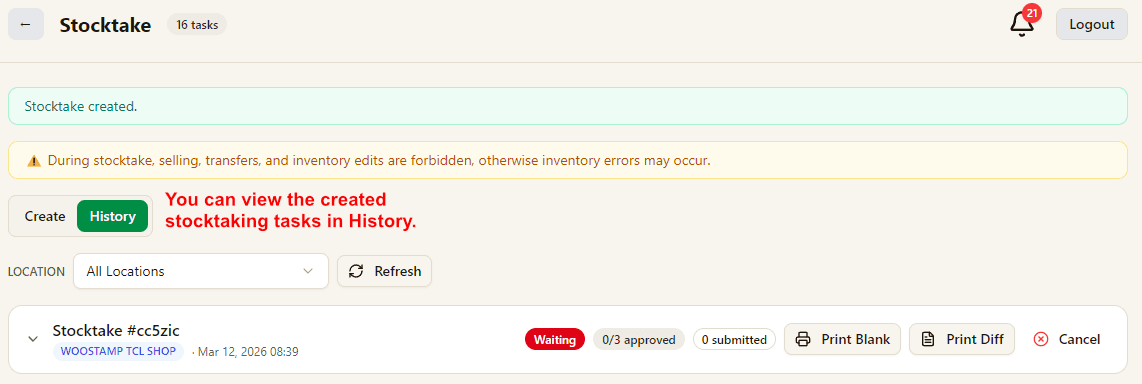
After creation, the stocktake task appears in History with status and print actions.
4. POS Receives the Stocktake Task
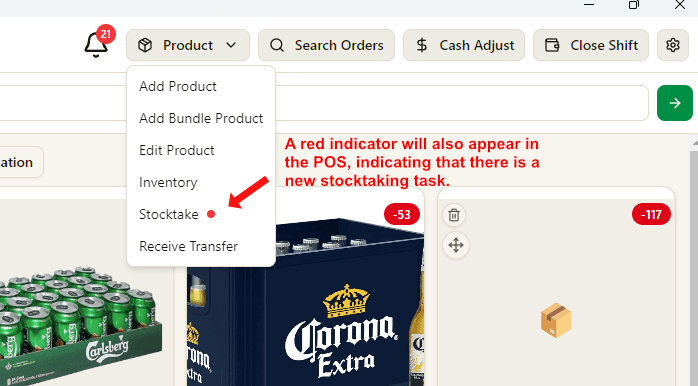
A red indicator appears in POS menu under Product to Stocktake so staff know a stocktake task is pending.
5. Cashier Enters Counted Quantity in POS
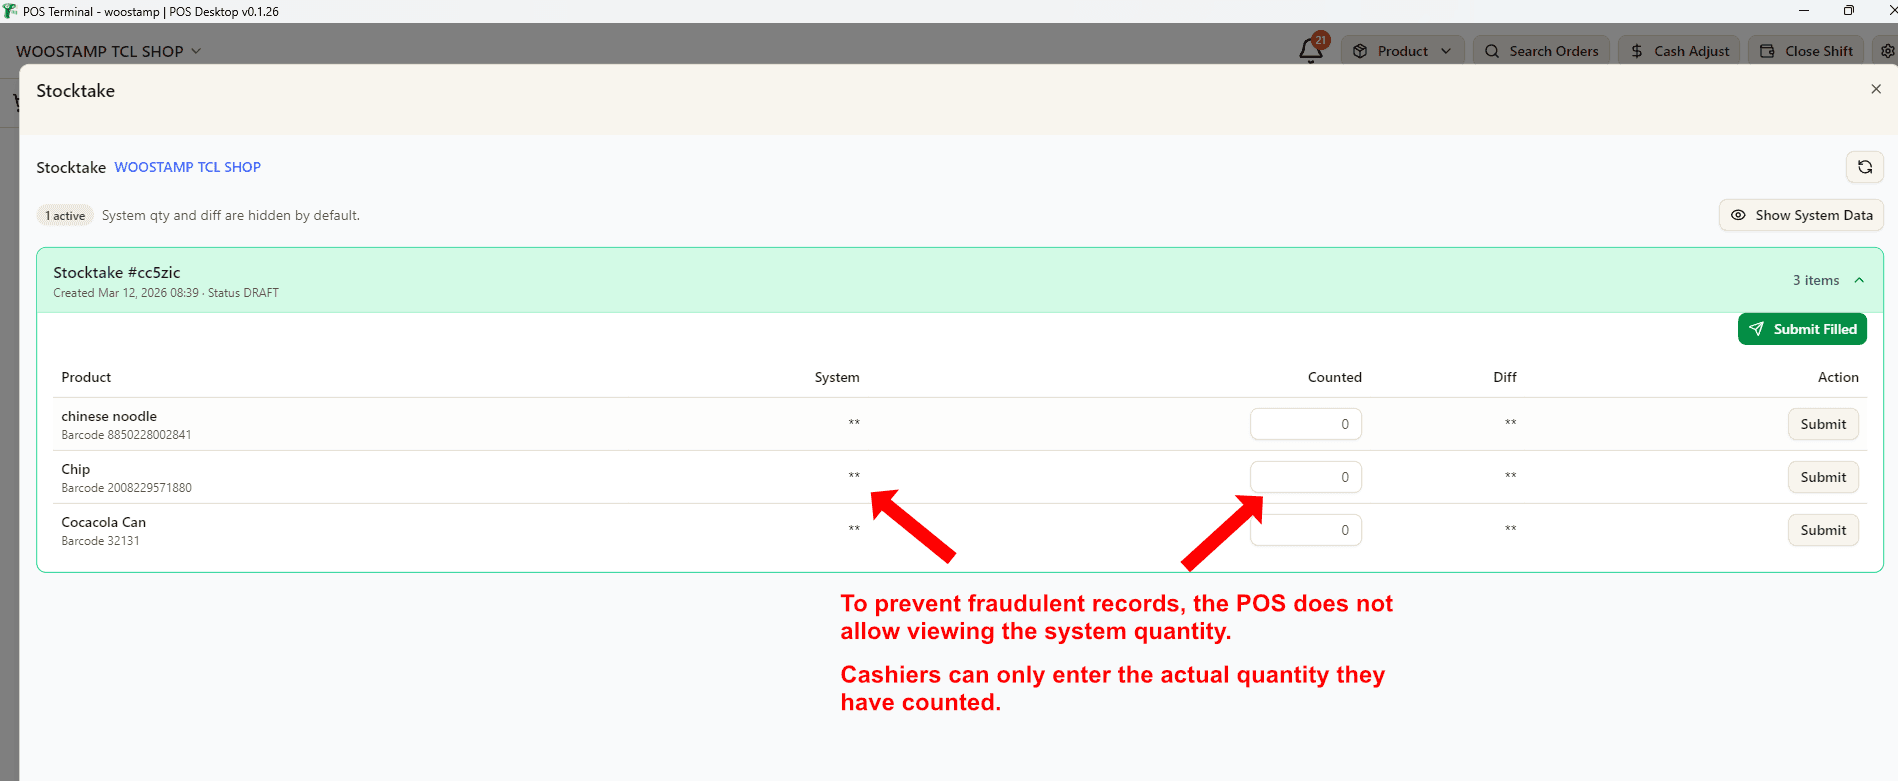
System quantity and difference are hidden by default to reduce fraudulent entries.
Cashiers only enter the actual counted quantity and submit it.
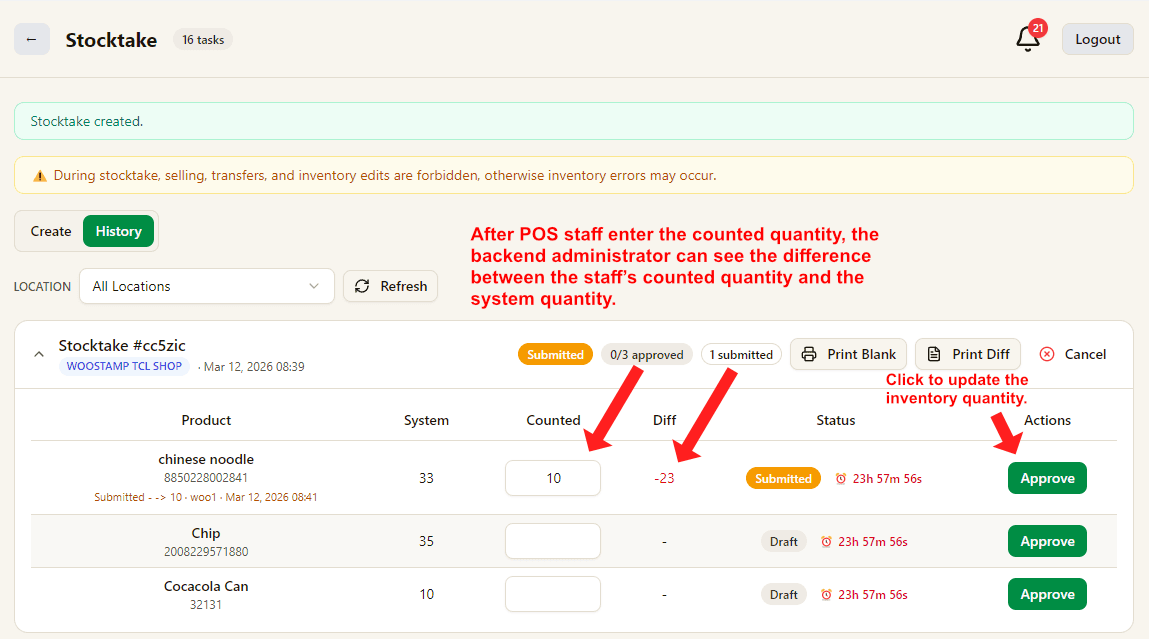
6. Admin Reviews Differences and Approves
In dashboard history, admin reviews System, Counted, and Diff, then clicks Approve to apply the inventory update.