

Products and product setup
Create products, add images, barcode values, package units, bundle items, and stock rules.
Create products & set wholesale prices
Watch on YouTube1. Add a Product
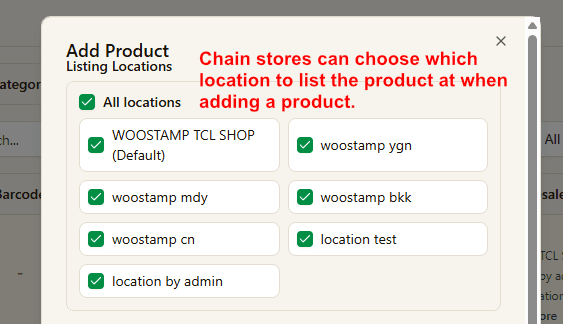
Select the listing locations first. Chain stores can choose exactly which locations should show this product.
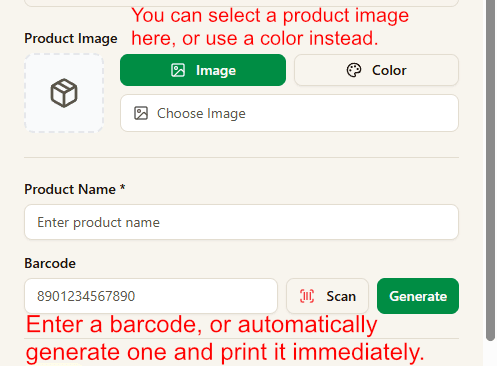
Choose image or color, then enter product name and barcode. You can scan a barcode or generate one automatically.
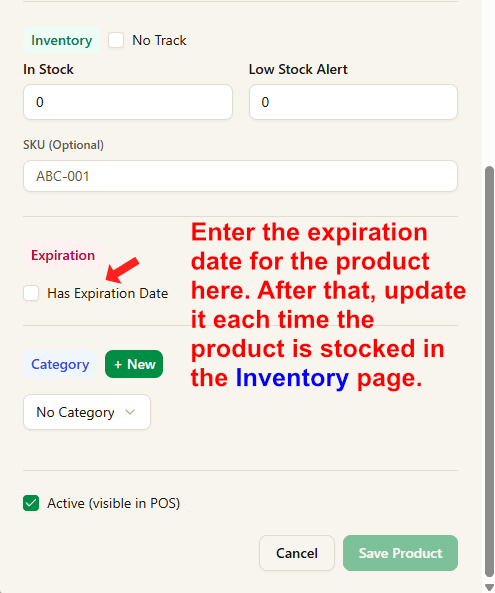
After the first setup, manage future expiration updates from the Inventory page when you restock.
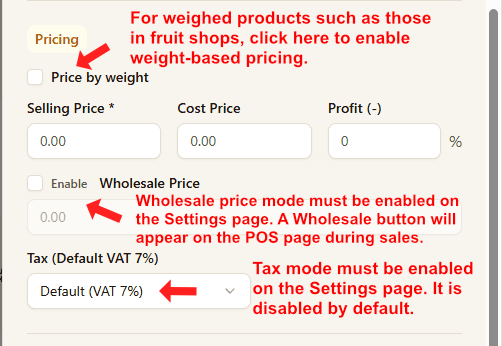
- Enable price by weight for weighed items.
- Wholesale price must be enabled in Settings before you can use it in sales.
- Tax mode must also be enabled in Settings. It is off by default.
2. Barcode Generate and Print
- Enter product name and barcode value.
- Click Generate to create the barcode preview.
- Click Print Barcode to open the print dialog.
- In Print Barcode, select the printer, label size, content and copies, then print. You do not need a separate Dashboard printer settings page.
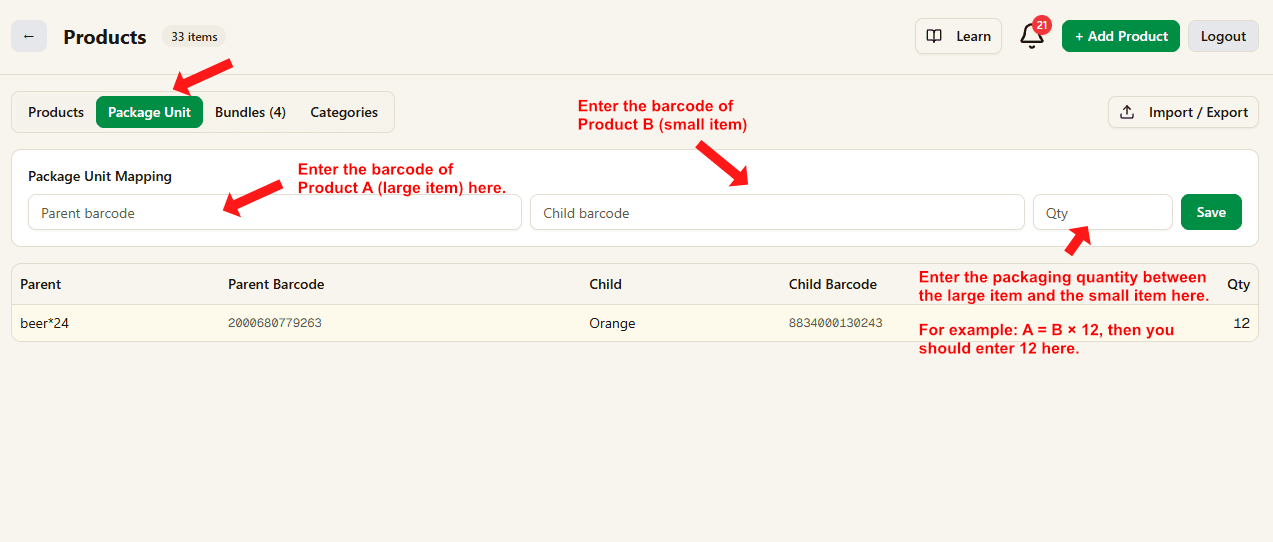
3. Package Unit (Auto Split)
A = B x 12. A is the parent pack product and B is the child unit product. One A contains 12 units of B.
When B stock is not enough during sale, the system automatically splits A into B and completes the sale.
This is fully automatic. No manual warehouse stock adjustment is required.
- Example setup: A = B x 12.
- Current stock: A = 2, B = 1.
- Customer buys 3 bottles of B.
- System auto-splits one A, then deducts sale quantity from B.
- Final stock: A = 1, B = 10.
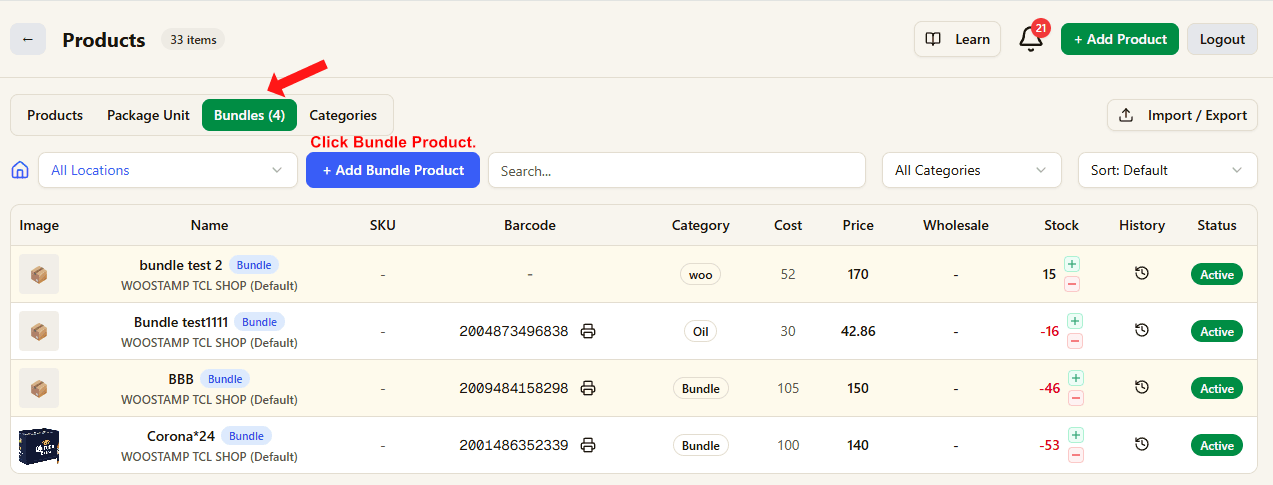
4. Bundles (Combo Product)
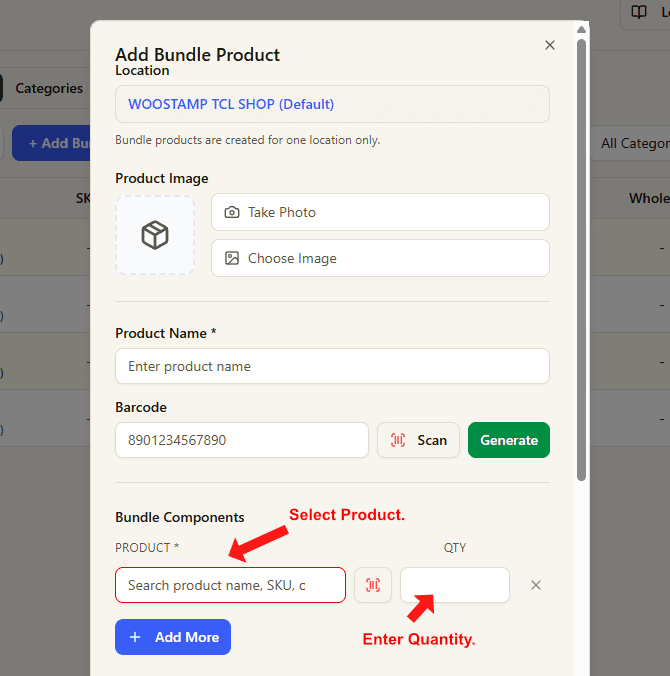
C = A x 2 + B x 2. C is the bundle product, and A and B are component products.
A and B must already exist before you create bundle C.
If you enter an initial quantity while creating C, the system deducts A and B inventory immediately by the bundle ratio.
If you leave the quantity empty, component inventory is deducted automatically at sale time.